
Kyle Turner: The Rabbitohs legend who never forgot his roots
How to draw a lion with simple shapes
Drawing a lion may seem like a roaring challenge at first, but with a bit of guidance, anyone can learn how to sketch this majestic animal. Whether you’re a young Aussie student, a hobbyist sketcher in Melbourne, or simply looking to improve your drawing skills, this guide is here to walk you through it.
From rough shapes to detailed fur, we’ll cover how to draw a lion from scratch in a way that’s easy to follow and enjoyable for all ages.
1. Gather your drawing materials
Before you begin, ensure you have all the essential tools at hand. While you can use anything from a simple pencil to digital software, here are the recommended supplies:
- Sketchbook or drawing paper – A flat surface helps one to sketch more easily.
- Pencils (HB, 2B, 4B, and 6B) – While lighter pencils aid with outlines, darker pencils are better for shading.
- Eraser – For little adjustments, a kneaded eraser does rather well.
- Blending stump or cotton swab – Combining a stump or cotton swab lets the shade changes go more smoothly.
- Fine liners or ink pens – Defining the last details is best done with fine liners and ink pens.
- Coloured pencils or watercolours (optional) – Adding colour makes your artwork stand out.
2. Start with basic shapes
Start by dissecting the drawing into component elements using basic forms:
- Head – Draw the lion’s head with a circle.
- Body – Chart a circular form considerably below the skull.
- Legs and tail – Using both straight and curved lines, outline the direction of the legs and tail.
- Ears and snout – Illustrate these attributes using smaller circles and lines.
This phase determines correct proportions; so, take your time changing the size and position.
3. Outline the facial features
A lion’s face is among its most unique characteristics. Use these rules to distil its core:
- Eyes – Draw two pupils shaped like almonds with small circles around their eyes.
- Nose – The lion’s nose is modelled from a rounded triangle.
- Mouth – Curving lines for the lips and chin will help the lion to have its unique look.
- Whiskers and fur details – Point subtly where the whiskers and fur may be found.
- Eyebrows and expression lines – Little elements around the eyes can give the lion more intensity.
4. Sketch the mane
The mane of a lion is among its most defining traits.
- Establish a natural, flowing mane with curved, undulating patterns.
- Draw fur strands in several directions to offer texture and depth.
- Maintaining a thinner mane density as it falls down the neck, keep it denser around the head.
- Think about the gender of the lion; male lions have bigger manes, while female lions have less fur around their faces.
5. Define the body and legs
Head and mane in place, focus on the lion’s strong physique.
- Chest and shoulders – Round, strong shoulders give power.
- Legs – Using flowing, smooth lines to draw the front and rear legs will help to define the muscles by including little curves.
- Paws – Lions have big paws, so make sure they complement their whole weight.
- Tail – The tail ought to be lengthy and terminate in a tuft of fur.
6. Add fur texture and shading
Give your lion drawing a more lifelike appearance by including texture and shadows:
- Short, quick strokes – A fur-like texture is produced by short, quick strokes with a light pencil.
- Shading – Under the mane, around the eyes, around the belly.
- Blending – With your finger or a blending stump, smooth darker patches.
- Highlights – Erase little areas to draw attention to the nose, forehead, and eyes.
- Depth and Contrast – Stretching the shadows under the mane and along the limbs will help the lion seem three-dimensional.
7. Refine the details
Your lion sketch is finished now; it’s time for polishing:
- Change the outlines as necessary.
- Add further elements, such as wrinkles around the nose and jaw.
- Look at symmetry, especially concerning facial traits and the eyes.
- If you are using ink, carefully go over your last lines and then remove any pencil traces.
- To seem more put together, adjust the fur and shading.
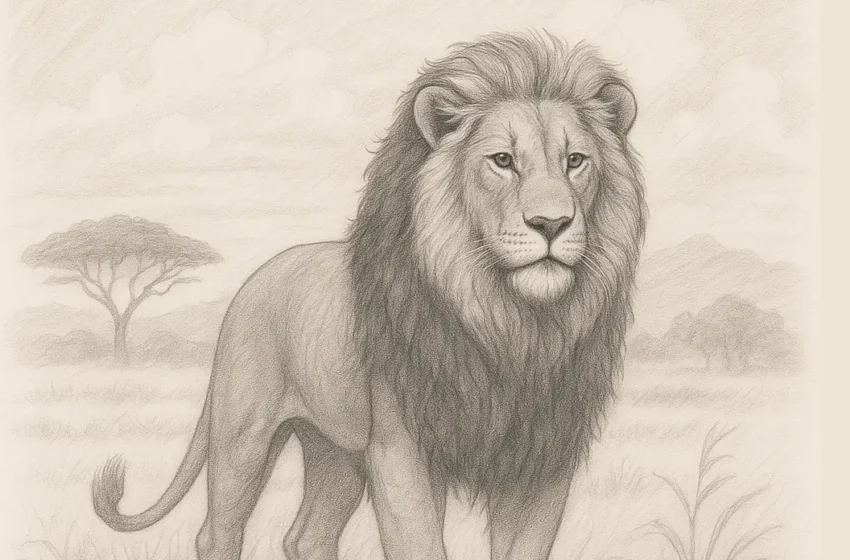
8. Final touches and background (Optional)
If you want to stretch your drawing, think about adding a background:
- Savannah scene – The lion’s natural habitat could be improved by a little meadow, including acacia trees.
- Sunset effect –The artwork will stand out with soft background colour or shading.
- Other animals – Including some smaller animals, such as zebras or gazelles- will add more dynamic composition.
- Sky details – The image might get intricate from clouds, birds, or even a far-off mountain range.
Common mistakes to avoid
- Incorrect Proportions – Make sure the head, body, and legs are in harmony using the correct ratios.
- Overcomplicating the Mane – Give flow top importance above too many details.
- Flat Facial Features – Use shade to give depth and steer clear of a two-dimensional appearance with flat facial features.
- Forgetting Texture – Lions have a rough coat; make fur is made with few strokes.
- Neglecting Expression – Emphasise on a lion’s face their power and intensity.
Conclusion
Drawing a lion takes time, patience, and practice. Start with simple sketches, then progressively hone your expertise. Whether you are drawing for fun or have developed great artistic ability, following these guidelines will enable you to capture the great beauty of a lion. Keep trying; soon you will be able to boldly produce amazing animal drawings!